Ever watched a $250,000 welding robot sit idle for three hours while your production targets slip away? If you manage factory automation, you probably just felt your blood pressure spike.
Every minute of robot downtime costs you real money. The worst part? Most welding robot errors are completely preventable.
This troubleshooting guide cuts through the complexity of industrial welding robot maintenance. You’ll discover the fastest fixes for common error codes, preventative maintenance schedules that actually work, and diagnostic techniques your operators can implement today.
The difference between struggling facilities and efficient operations often comes down to how quickly they can identify and resolve welding robot issues.
But before we dive into the technical solutions, there’s one counterintuitive approach that fixes 40% of problems without touching a single wire…
Preventive Maintenance Strategies

A. Daily Inspection Checklist
Robot downtime is a killer for production. Trust me, a 5-minute check each day saves hours of headaches later. Start your shifts with these quick checks:
-
Inspect all cables for cuts, frays, or kinks (especially at connection points)
-
Check torch nozzle for spatter buildup
-
Confirm wire feed is smooth with no slippage
-
Verify all safety guards are in place
-
Look for loose bolts on fixtures and the robot arm
-
Test emergency stop buttons
Pro tip: Create a laminated checklist near each robot station. Operators should initial after completion to ensure accountability.
B. Weekly Maintenance Tasks
Weekly checks catch issues before they become expensive problems:
-
Clean all air filters and check air pressure settings
-
Test TCP (Tool Center Point) accuracy with calibration fixture
-
Clean and inspect power source connections
-
Check coolant levels and look for leaks
-
Verify all communication connections
-
Review error logs for recurring warnings
The most overlooked task? TCP testing. A misaligned tool center point might not stop production, but it’ll slowly degrade weld quality.
C. Monthly Deep Cleaning Protocol
Your robots need a spa day once a month:
-
Power down completely and lock out/tag out
-
Remove covers and vacuum all cabinet interiors
-
Clean fan filters and heat sinks
-
Remove excess grease from all joints
-
Inspect internal cable routing for wear
-
Clean teach pendant screen and check all buttons
-
Check encoder batteries (replace annually)
Most wear-and-tear issues show up during these deep cleans.
D. Lubricant Selection and Application Tips
Not all lubricants are created equal. Using the wrong one is a common mistake in our welding robot troubleshooting guide.
| Component | Recommended Lubricant | Application Method | Frequency |
|---|---|---|---|
| Robot Joints | Manufacturer-specified grease | Grease gun at fittings | Every 6 months |
| Wire Feed System | Dry PTFE lubricant | Light spray | Monthly |
| Linear tracks | Heavy-duty rail grease | Manual application | Quarterly |
Never use WD-40 on precision components! It’s not a long-term lubricant and can attract dust.
E. Wear Part Replacement Schedules
Don’t wait for failure. Replace these consumables proactively:
-
Contact tips: Every 8-16 hours (depends on material)
-
Gas nozzles: Weekly or when spatter buildup affects gas flow
-
Liners: Every 3 months or when wire feeding issues occur
-
O-rings/seals: During quarterly maintenance
-
Drive rolls: Check monthly, replace when grooves form
Document every replacement in your maintenance log. Over time, you’ll develop custom schedules based on your specific production demands.
Fixing Mechanical Problems

A. Wire Feed Malfunctions
Ever had your welding robot suddenly stop feeding wire? It’s one of those problems that’ll halt production faster than a coffee spill on your control panel.
Wire feed issues usually stem from three culprits: worn drive rolls, improper tension settings, or debris in the liner. Check your drive rolls for grooves or wear marks first. They’re cheap to replace and often the root cause.
If tension’s your problem, remember this rule of thumb: tighten just enough that the wire doesn’t slip when you give it a tug. Too tight and you’ll deform the wire; too loose and it’ll slip during operation.
For liners, grab that compressed air and blow it through. You’d be amazed at the metal shavings that build up over time.
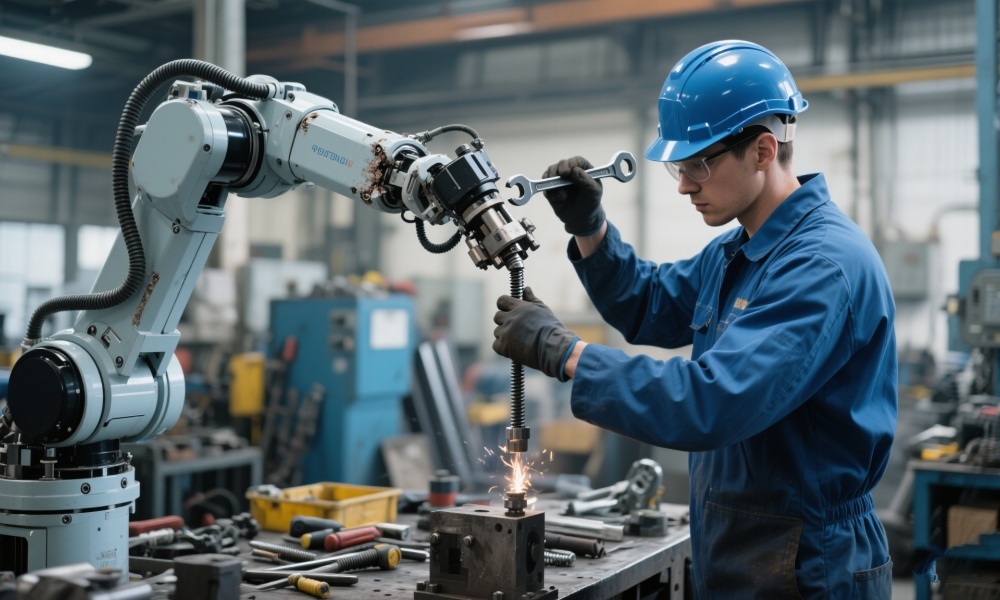
B. Torch Alignment Issues
Your robot can have perfect programming, but if the torch is misaligned, you might as well be welding blindfolded.
Look for bent nozzles, loose connections, or collision damage. After a crash, always verify Tool Center Point (TCP) accuracy using a TCP check fixture. Even 1mm off can create inconsistent welds.
Quick test: run a simple weld program on test material. If your weld starts drifting or the arc sounds unstable, your torch alignment needs attention.
C. Calibration Procedures
Calibration isn’t just a fancy word to make technicians feel important. It’s the backbone of precise welding.
For most robots, follow this basic calibration sequence:
-
Home position verification
-
TCP calibration (using the 4-point method)
-
Work object calibration
-
I/O verification
Document every calibration with date and results. This creates a history that helps identify when performance begins to drift.
D. Fixing Servo Motor Problems
Servo motors are the muscles of your welding robot. When they act up, check these areas:
-
Excessive heat: Often signals overload or ventilation issues
-
Unusual noise: Listen for grinding or clicking that suggests bearing failure
-
Error codes: Document them before resetting – patterns tell stories
-
Backlash: Test for mechanical play in joints
Don’t just reset and hope for the best. That error code is trying to tell you something, and ignoring it is like ignoring chest pain – eventually, it leads to a major breakdown.
For preventive maintenance, monitor servo current draw. Rising current requirements often indicate developing problems weeks before failure occurs.
Resolving Software and Programming Issues

A. Updating Robot Controller Software
When your welding robot starts acting up, outdated software is often the culprit. Think about it – you wouldn’t run a 5-year-old operating system on your phone, so why do it with your expensive robot?
Most manufacturers release firmware updates quarterly that fix bugs and add features. Check your robot’s current software version through the teach pendant and compare it with the latest available on the manufacturer’s portal.
Before updating:
-
Back up all programs and settings
-
Schedule downtime during non-peak hours
-
Download the correct version for your specific model
The update process typically takes 30-45 minutes. If something goes wrong during the update (power outage, etc.), you might need recovery tools from your manufacturer.
B. Troubleshooting Path Programming Errors
Path errors make robots move where they shouldn’t – causing missed welds, collisions, or just plain weird movements.
Common path programming errors include:
-
Incorrectly defined points
-
Speed settings that are too high for the application
-
Acceleration/deceleration values that are unrealistic
-
Logic errors in program flow
To fix these, step through your program in test mode at reduced speed (10-25%). Watch for jerky movements or hesitations that signal trouble. Use the pendant to check each point’s coordinates and compare them against your intended path.
C. Fixing Coordinate System Problems
Ever had your robot confidently weld the wrong spot? You’ve got coordinate system issues.
Robots navigate using multiple coordinate systems:
-
World coordinates (fixed factory floor reference)
-
Tool coordinates (relative to the welding torch)
-
User/work coordinates (relative to the workpiece)
When these get mixed up or improperly calibrated, chaos follows. Recalibrate your tool center point (TCP) using the manufacturer’s recommended method – usually a multi-point teaching process. For user frames, teach at least three reference points on your fixture to properly orient the coordinate system.
D. Restoring Corrupted Programs
Corrupted programs happen. Power surges, improper shutdowns, or memory issues can scramble your robot’s brain.
If you’ve been backing up regularly (you have, right?), restoration is straightforward:
-
Access the backup utility on your teach pendant
-
Select the most recent working backup
-
Restore to the robot’s memory
-
Test thoroughly before returning to production
No backup? You’ll need to recreate the program from scratch. Start by reviewing any documentation on weld parameters and path coordinates, then reteach manually.
E. Network Connectivity Solutions
Modern welding robots rarely work in isolation – they’re connected to plant networks for monitoring, programming, and data collection.
When network issues strike:
-
Check physical connections first (Ethernet cables, switches)
-
Verify IP address settings match your network configuration
-
Ensure firewalls aren’t blocking required ports
-
Test connectivity with simple ping commands
For stubborn network problems, a factory reset of the robot’s communication module might be necessary. Document current settings before attempting this nuclear option!
Optimizing Welding Parameters

Adjusting Current and Voltage Settings
Ever watched your welding robot produce inconsistent welds? Nine times out of ten, it’s because your current and voltage settings are off. These two parameters are the backbone of any good weld.
Too much current? You’ll burn through thin materials faster than you can say “defect.” Too little? You’ll get poor penetration and weak joints that fail inspection.
Here’s a quick reference table for common materials:
| Material | Current Range (A) | Voltage Range (V) |
|---|---|---|
| Mild Steel | 120-180 | 18-22 |
| Stainless Steel | 100-150 | 19-24 |
| Aluminum | 140-200 | 22-26 |
Don’t just set it and forget it. Check these settings between shifts or whenever you switch materials.
Fine-tuning Wire Feed Speed
Wire feed speed can make or break your welding operation. Too fast, and you’ll get spatter everywhere. Too slow, and your beads will be inconsistent and lumpy.
The sweet spot? It depends on your material thickness and joint type. But as a rule of thumb, start with 300-400 inches per minute for mild steel and adjust from there.
Got wire feed issues? Check these common culprits:
-
Worn feed rollers
-
Kinked liner
-
Incorrect drive roll tension
-
Clogged contact tip
Gas Flow Optimization
Gas shielding isn’t something to skimp on. The right flow rate prevents porosity and ensures weld quality.
For most robotic MIG applications, 25-35 cubic feet per hour works well. But here’s the thing – more isn’t always better. Excessive gas flow creates turbulence that actually pulls in atmospheric contamination.
Test different flow rates on scrap material until you get clean, spatter-free welds. And don’t forget to check for leaks in your gas lines – they’re money down the drain.
Weld Cycle Time Improvements
Cycle time affects both quality and productivity. Rush the robot, and quality suffers. Go too slow, and you’re leaving money on the table.
Small tweaks make big differences:
-
Optimize travel paths to minimize torch movement
-
Reduce non-welding time (robot repositioning)
-
Use faster travel speeds on non-critical sections
-
Pre-program optimal start/stop positions
Remember to balance speed with quality. Faster isn’t better if it means more rework later.
Reducing Downtime with Smart Preparations
A. Critical Spare Parts Inventory
Downtime costs money. Simple as that. When your welding robot breaks down, every minute it’s offline is cash flowing out the door. Smart factory managers keep critical spare parts on-site – think torch tips, wire liners, servo motors, and controller boards.
I’ve seen factories cut downtime by 70% just by stocking the right parts. Don’t guess what you need. Track failure points over 3-6 months and you’ll spot patterns. Those frequently failing components? That’s your inventory list right there.
B. Cross-Training Maintenance Staff
Your maintenance guru just called in sick. Now what? If only one person knows how to fix your welding robots, you’re setting yourself up for disaster.
Cross-training is your safety net. Pair your specialists with apprentices. Create shadow programs where junior techs follow veterans. Better yet, rotate responsibilities monthly so everyone gets hands-on experience with different robot models.
C. Creating Response Flowcharts
When alarms blare, decisions need to happen fast. Flowcharts eliminate guesswork.
Start with common errors and map out exactly what to do. Post these charts near workstations and in maintenance areas. Use color-coding: red for safety issues, yellow for production impacts, green for quick fixes.
D. Tool Organization for Quick Access
Nothing wastes time like hunting for tools mid-emergency. Create dedicated troubleshooting kits for each welding cell.
Shadow boards work wonders – outline where each tool belongs so missing items stand out immediately. Position these kits strategically around your production floor. Label everything clearly and check inventory weekly. When seconds count, having the right tool within arm’s reach makes all the difference.
Implementing Predictive Maintenance

A. Vibration Analysis Techniques
Think of vibration analysis as your welding robot’s heartbeat monitor. Abnormal vibrations often signal trouble before catastrophic failures hit. Here’s what you need:
-
Accelerometers: Stick these sensors on key robot components to track vibrations in real-time
-
Spectrum analyzers: These tools break down vibration patterns into readable data
-
Baseline measurements: Take readings when your robot is working perfectly, so you know what “normal” looks like
When vibration patterns change, your maintenance team gets alerts before problems escalate into downtime disasters.
B. Temperature Monitoring Systems
Your welding robot runs hot—but how hot is too hot? Temperature monitoring catches overheating issues that lead to premature component failure.
Install infrared cameras and thermocouples at critical points:
-
Servo motors
-
Control cabinets
-
Welding end effectors
-
Power supplies
Modern systems can track patterns over time, spotting gradual temperature increases that might indicate deteriorating insulation or bearing issues.
C. Power Consumption Tracking
A spike in power usage often means your robot is working harder than it should. By monitoring electrical consumption, you’ll catch:
-
Mechanical binding issues
-
Failing components
-
Inefficient programming
-
Worn bearings and drives
Most factory systems can be equipped with power monitors that integrate with your existing maintenance software.
D. Leveraging Historical Error Data
Smart factories don’t just collect data—they learn from it. Your robots generate mountains of error codes and performance logs. Use them!
Create a database that connects:
-
Error frequency patterns
-
Seasonal variations
-
Production volume impacts
-
Maintenance history
This historical perspective helps predict when similar failures might happen again.
E. ROI of Predictive vs. Reactive Approaches
The numbers don’t lie. Reactive maintenance (fixing things after they break) costs 3-9 times more than predictive maintenance.
| Approach | Downtime | Parts Cost | Labor Cost | Production Loss |
|---|---|---|---|---|
| Reactive | High (8-24 hours per event) | Full replacement | Emergency rates | Major disruption |
| Predictive | Minimal (scheduled) | Often just components | Standard rates | Planned & minimal |
A typical welding robot failure costs $15,000-$30,000 in production losses alone. Predictive maintenance typically delivers ROI within 3-6 months of implementation.
Effective troubleshooting of welding robots requires a comprehensive approach that combines preventive maintenance, mechanical expertise, software knowledge, and parameter optimization. By implementing regular maintenance schedules, quickly addressing mechanical issues, resolving programming errors, and fine-tuning welding parameters, manufacturing facilities can significantly reduce costly downtime and extend equipment lifespan.
The transition to predictive maintenance represents the future of industrial welding operations. By preparing spare parts inventories, training staff properly, and leveraging data analytics to anticipate failures before they occur, factories can transform their maintenance approach from reactive to proactive. This investment in smart troubleshooting practices not only improves operational efficiency but ultimately enhances product quality and strengthens your competitive position in the manufacturing industry.