Automation has changed how manufacturing and other processes are conducted. They have made work easier and faster, and this has boosted productivity a great deal. The technology behind these inventions is advanced, and this is why only a select few companies in the world have been able to nail their manufacturing. But can someone make their own robotic arm from scratch?
We are going to explore the process of creating your own robotic arm from scratch, the materials that you will need, and the challenges you may encounter along the way. If you have been wondering whether making a robotic arm is possible, then you are in the right place.
Things to Consider
Before embarking on the journey to create your own robotic arm, there are some things you have to keep in mind first in order to proceed with a clear plan without any interruption. These factors include the following.
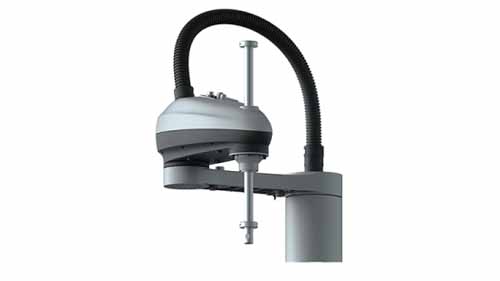
Purpose: There are different types of robotic arms, and you have to figure out the type you want to go with. Since you will not be making a huge natural type, you are probably looking to design something small for demonstrations. This is much easier to design and make as it doesn’t require complicated parts.
Materials: Once you have determined the purpose, it is time to get busy looking for the right materials. If the robotic arm you are aiming for is a simple one for demonstration purposes only, then simple materials like plastic and wood will do. If you are making something with advanced robotic joints, then consider better and stronger materials.
Budget: You shouldn’t break your bank for this project, but at the same time, don’t limit yourself too much to the point where you end up using very inferior materials. Find a way to balance things out so that you acquire what you ended without running out of cash.
Programming Level: If you have no background in programming or handling advanced machines, then this may be out of your league. At some point, you will have to code a simple program that helps run the robotic arm. LAck of programming will hinder your ability to create something unique.
The Size: The bigger the size of the robotic arm, the more the materials you will need, the more the time you will require to handle the project and at some point, you may have to get some external help. For most home made robotic arms, the size is usually smaller and for demonstration purposes only.
The Process
Contrary to what most people may be led to believe, making a simple robotic arm is not that complicated, and it can be done with anyone who has a good grasp of programming and is good with machines. The following is how you make a robotic arm from scratch.
Step 1: Assembling the Materials

Source: Pinterest
You have to collect the needed materials for the construction. This ranges from a servo motor, a potentiometer, end effectors, wires, soldering tools, and a clean working area. Arrange everything in order so that you can be aware of the location of each element to avoid confusion and mixing things up.
Step 2: Drawing the Schematic
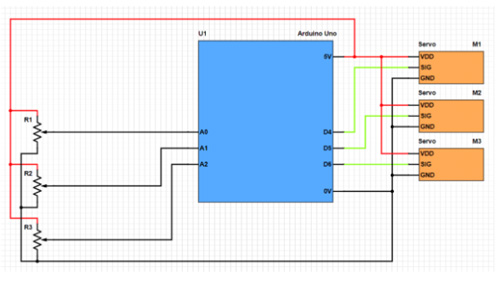
Source: Maker.pro
This is a drawing that shows where each component will be inserted and secured. It is the blueprint that you follow when making the robotic arm. By carefully notarizing the names and locations of each part, you will be able to figure out the final size of the machine, allowing you to make informed adjustments along the way.
Step 3: Joining the Hardware
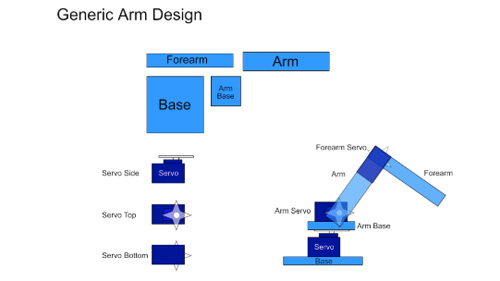
Source: Maker.pro
Once the schematic is laid down, it is time to bring all the hardware together. This includes the servo motor, the end effectors, the base, the connecting wires, and any other necessary addition that you feel will be needed to make the entire thing efficient.
The design here is very straightforward,, and it is guided by three simple things.
- A base motor that will be responsible for rotating the arm around.
- A first arm motor for raising and lowering the base of the arm.
- A second arm motor that will help raise and lower the forearm.
Depending on the material you choose in the beginning, the construction here is simple. For the prototyping, you are advised to use cardboard as it is easier to cut and model and this will give you an idea of the size you should be going for.
You can also use plastics like acrylic, which will provide you with all the strength you need to hold everything together as you slowly add heavy components. If you have the means, then use 3D printed parts for the complex sections for a more refined robotic arm.
Step 4: The Software
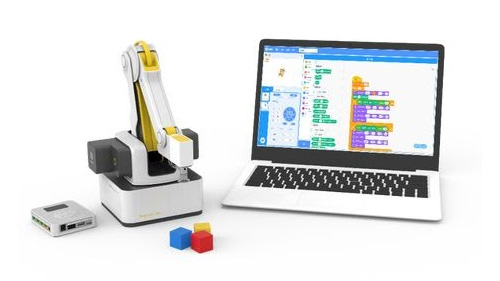
Source: Pinterest
Once the hardware parts are in place and ready, it is time to come up with a program that will run the entire robotic arm. The reason why this part comes last is to help you tailor the program to the specific parts that you have just made in the previous steps.
If programming is a little out of your area of expertise, you can always buy it online and try to tweak it to your machine, although this would be very complicated. The success of this part will be much more assured if you have some good grasp of simple programming.
The idea here is to make a simple program that is able to execute simple functions like movements, picking, and rotating; after all, this is just for demonstrations.
Conclusion
Making a robotic arm is not that hard if you have the time and the resources. You may not have the capacity to make something that can handle heavy tasksaround the house, but you sure can make something fun that you can show your friends when they come over. To understand more about how you can make robotic arms from home, check out our website and go through loads of resourceful material that will point you in the right direction.